Now that the engine/transmission is located, the lower oil pan can get designed and fabricated. This was another project that had many solutions, but ultimately I decided to go with the most simple solution (kind of :)). The lower oil pan is just a big deep bucket which fit, but would be the lowest thing on the car by at least 6 inches so that was not a viable solution. Simply cutting the pan off and welding a plate to the bottom was considered, but ruled out due to the significant reduction in oil capacity.

Systems to hold pressurized oil externally were looked at, but ultimately deemed too complicated and ineffective. So, how do you hold the same volume but only 2-1/2″ deep? Make it wide.
This started off with a flat sheet of 1/8″ steel and a length of 3/4″ diameter steel tubing and a couple days later, it looked like this!
I started out by laying out the basic shape, then cutting the 1/8″ flat in half and stacking the two pieces on top of each other. I tig welded the edges together in a couple spots to keep them aligned as the bolt pattern was transferred.

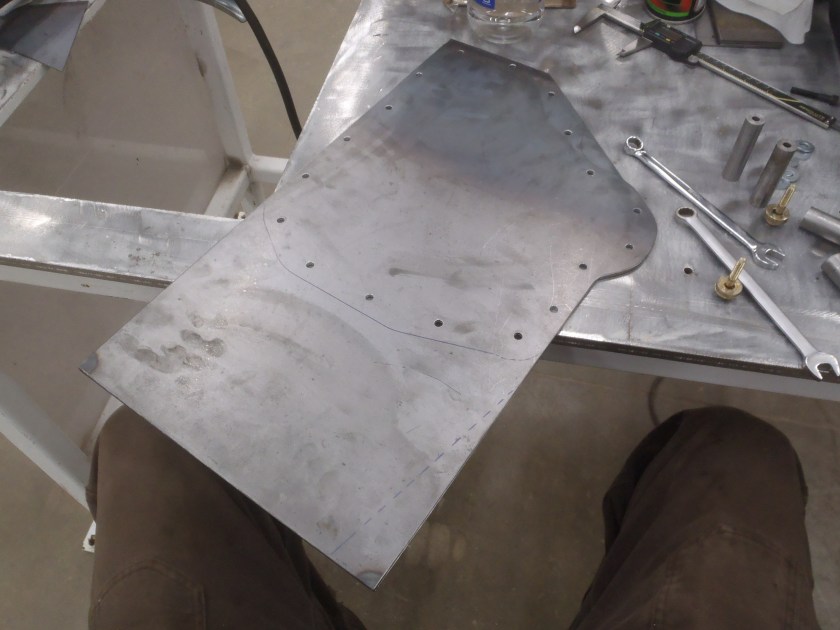
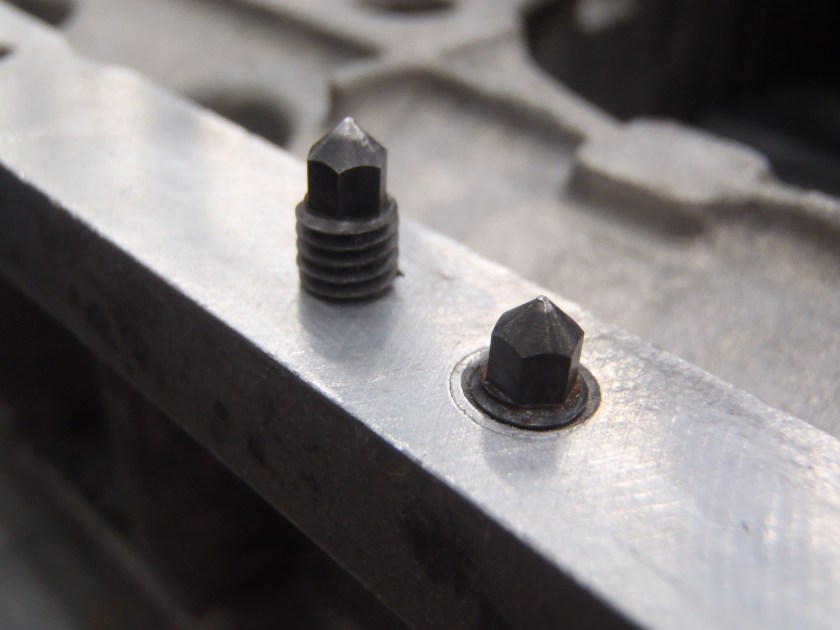
I used transfer screws to transfer the bolt pattern from the upper pan to the lower pan which worked out very well. I did it using 3 at a time. Two in existing dimples and one to make a new dimple. Once you make the new dimple, take any one and move it to the next hole and make a new dimple – just keep walking your way around the perimeter keeping the 3 transfer screws spread out.
Once the holes were marked they were drilled through both pieces with a clearance hole for M6x1.0 screw (~1/4″), then the welds were ground off and the pieces separated into top and bottom. The top was traced on the inside to cut out the center whereas the bottom was left alone.
Now, how to get all 18 tubes to line up on both the top and bottom and get them sealed? The tubes were cut to length and then faced off on a lathe to be within ~0.005″ of each other, chamfered and deburred. Then this fixture was used to both locate and clamp the tubes to the “top” so they are concentric and square. The cylinder was turned and polished with emery cloth so that it had a nice tight fit inside the tube. The cylinder was also cut to be ~1/8″ shorter than the tubes so when the bolt was installed, it squeezed the tube against the plate keeping it tight and square.


After all these were welded in, the holes in the bottom plate were enlarged to slide over the tubes. A step drill was used to maintain concentricity and give a nice round hole. There was some distortion in the top plate, but everything bent into place nicely.


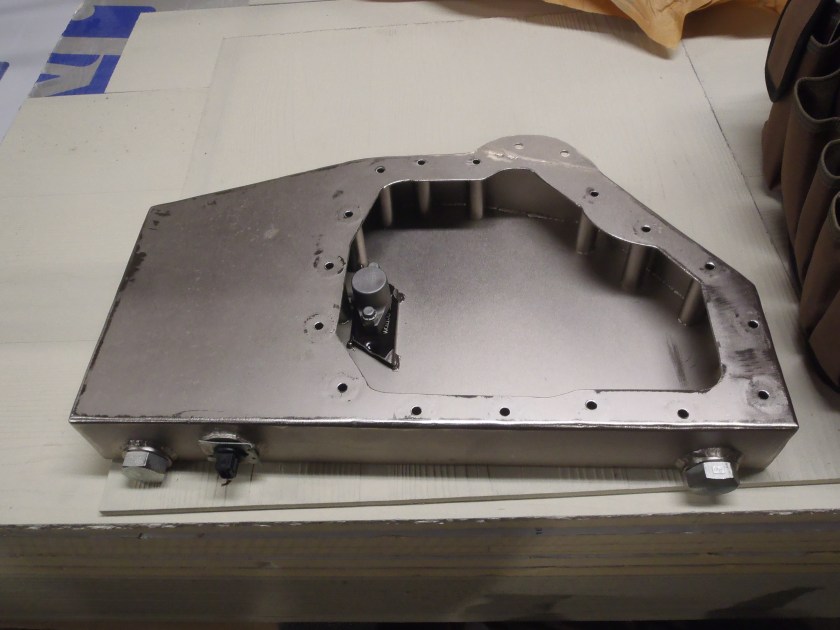
Once the tubes were welded up, the perimeter was enclosed. Provisions for low oil level sensor and drain plugs were included as well.


Due to the shallow and wide nature of the pan – the drain plugs required a bit of extra thought to allow all the oil to drain out. The plug threads are right at the bottom surface of the pan so there’s no lip to hold any oil. The outside is full perimeter so it will seal, and there is one on each side because there wasn’t room to put a single one in the middle. The plugs were torqued into the boss so that the flats align – no switching drain plugs side to side :).


These were then welded into a D shaped hole cut in the back of the pan. Clearance to the tubes for the mounting bolts was tight!


Once the pan was all welded out and test fit, it was sent out for electroless nickel plating. Electroless nickel does not rely on a magnetic field to deposit so it will get down deep in the tubes and equally cover all the surfaces, both inside and outside. The plating is ~25 microns thick (0.001″) so hopefully will stand up to the elements well. It’s rather hard and slippery as you’d expect from nickel.


Whew – The oil pan(s) are done! What an adventure that was. Next up – Steering. Stay tuned for more!
